Thursday 30 September 2010

NEW Limited Edition Sally Hansen Complete Salon Manicure Polishes

So I went to Rite Aid on my lunch, and what do I see.....the NEW Sally polishes!! I love my Rite Aid, they are always up to date on the new collectionc. I only grabbed 3, for the rest looked very common, imo.

This is Problem Child. Which reminds me very much of OPI's Merry Midnight. I think of Problem Child, as Merry M. little sister. PC, doesn't seem to have as big of, or as much flakies compared to her big sis. Still this color is beautiful!


This is Golden Ticket. Since it's sheer, I layered it over Problem Child, and really like it!


This is my FAVORITE of the 3 that I got, It's Sequin Scandal. A very dark olive/army green, with gold & green tiny glitter and what may be teeny tiny iridescent flakies, but not many, so don't get too excited.


Wednesday 29 September 2010

Scotch Tape Striped Mani - Is my love for Turquoise Opal obvious?

I actually did this mani yesterday, but didn't get a chance to post it. I was trying to find other designs I could do, using scotch tape. Stripes came to mind. So I grabbed my trusty black, and Sally Hansens Nail Prisms Turquoise Opal, and started working on it. It was actually easier than I though, and I love this effect


This is with the flash on, see how much the turq. shows!!!

My Vegas Showgirl Mani

This is the mani design I chose today. As much as I like it, it feels very Vegas to me, lol. The gold is Color Club's Enchanted Holiday, from this years mini set. The black is my HG, Sinful's Black on Black. I used scotch tape for the diagonal design. If you're interested in doing this, I posted about it a little while ago, and gave step by step instructions.


Thursday 23 September 2010

OMG!! Check out all these colors!!!

This seriously might be my fave mani to date! It's SH Prisms, Turquoise Opal
Oh and ignore the nick on my pinky :( Too lazy to fix.


Thanks for looking, hope everyone has a great day/night :P


Lunchtime Mani. Funky French

So I switched things up a bit, and didn't do a black tip!!! Woo hoo, lol.The tips color is SH Inst-Dri, Grape Going. I love this color uber much!


My first Frankening Attempt....

So last night I attempted to franken for my very first time!!! I had alot of fun doing it, and even my hubby loved the results.

This is actually the 2nd franken I made, and my fave!
Here is what I used. Well the 2 on the left didn't get added till later, but you will see...


Before the teal & gold glitters.


With the glitters added


Here is my 1st franken. I fogot to take a pic of what I used, this is a mixture of a blue & pink medium sized glitters from Funky Fingers, with WnW Black & some of the bad batch of ChG BFF. In this pic you can kind of see the holo from BFF


Here you can see more of the actual glitter


I can't wait to try this last one in the sun, and maybe I will like it better. This was a lot of fun though, and I can't wait to do more.

How to : My French, Funky French and Other Nail Designs

Many times while on MUA, I will post pictures of nail designs & TONS of funky frenches. I often get asked just how I do it. So here is my step by step for you guys.

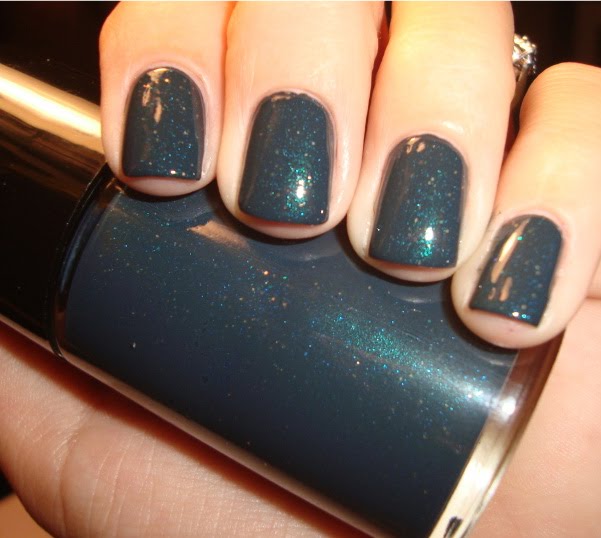
Here is the mani, I will be showing you how I did.
The colors I used are Finger Paints - Tough Art to Follow & Savvy Green with Envy.


First you paint your base color, this can be ANY color you want. You need to make sure it dries though.


Then, I take scotch tape, and stick it to my palm. You will see later why I prefer scotch to painters tape. I stick it to my palm, so it takes away some stickiness, and doesn't pull up the base color.


Then I tape it onto my nail, in the desired design, here it is my diagonal design.
If you notice since the tape is clear, I can tell whether or not it is completely taped down correctly. So I don’t get any leaking underneath the tape. This is what it will look like –


Once you have it right, you paint your nail the other polish color –
Remember to do 1 nail at a time, otherwise the 2nd polish can dry to the tape, and pull up.


Once you're done, painting the nail, just slowly pull the tape off. Then do this to the rest and Ta-Da, you’re done.


I hope this helps, and is easy to understand. I'm not the best at explaining the process. If you look back at some of my past manis, you will see I use this technique a lot. I love my funky frenches, and for them, you just tape the nail off, leaving the tip open and free to paint the color of your choice.